ChartNet Mobile |
  
|
ChartNet Mobile |
|
ChartNet Mobile is a smartphone dictation application. This can be downloaded from Google Play or Apple App Store. NOTE: There are minor cosmetic differences between the iPhone dictation app and the Android dictation app.
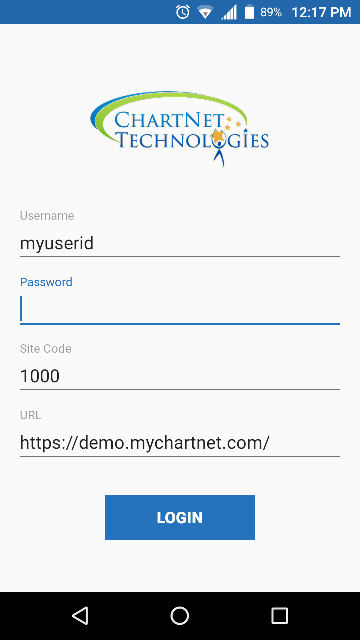
LOGGING IN
Start the ChartNet app on the mobile device. On the initial screen, enter in the Username, Password, Site and URL provided by the Transcription company. The application will remember the data entered, except for the password, for the next time you log in. Press the Login button on the login screen or on the keyboard screen.
MAIN SCREEN
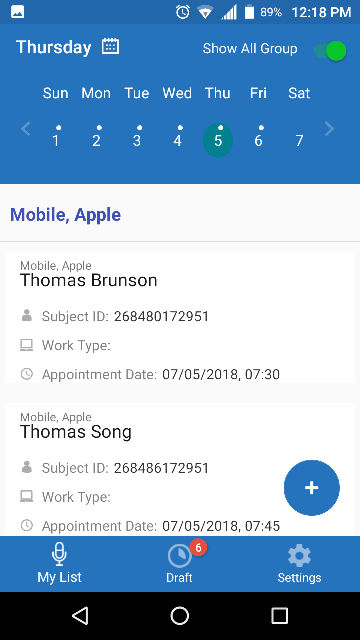
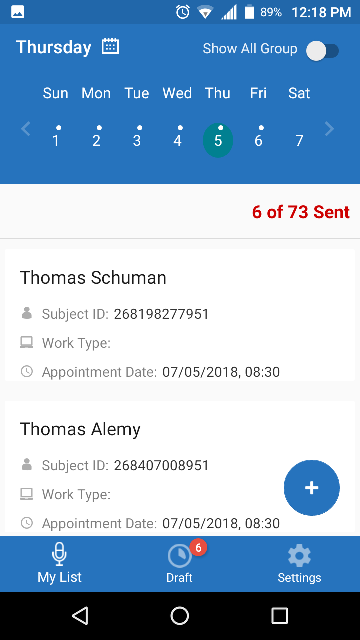
Once you are logged into ChartNet Mobile, if there is a schedule integration, it will show you a list of your appointments. This will display the number of appointments you have for that day. You can select a day from the calendar to display the appointments for that day. You can use the < and > to change the week you are viewing.
The below image shows you have 73 appointments for the day. Six of those have been submitted for dictation.
This screen also displays the number of Drafts (recordings not submitted for dictation) you have on the device. The below image shows this device has 6 Drafts that have not been submitted.
You have the ability to be part of a Group. This group will allow you to view and dictate for anyone n that Group. This is especially helpful for a Physician's Assistant
|
When you select the “Show All Group” (upper right corner), the device will display appointments assigned to you as “My Patients” (image 3). This will be at the top of the list. As you scroll down the list, it will then display each of the appointments grouped by the person in your group
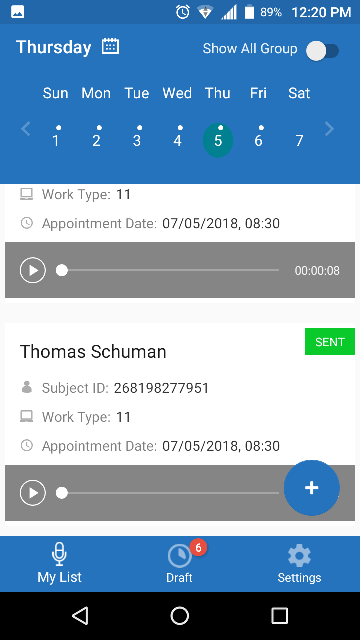
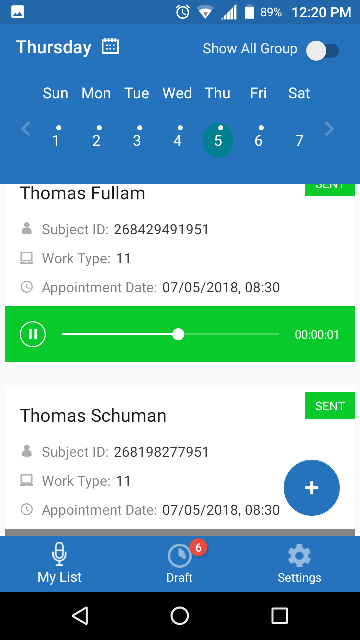
To listen to a previous dictation, just tap the play button displayed in the appointment (Image 5). It will play the dictation directly from this screen.
|
You can also go to the subjects information screen to play the audio by selecting the person listed.
Drafts will be displayed within the list in the current appointment order or to see all the drafts, click on the Draft button center bottom of the screen

STARTING A NEW DICTATION
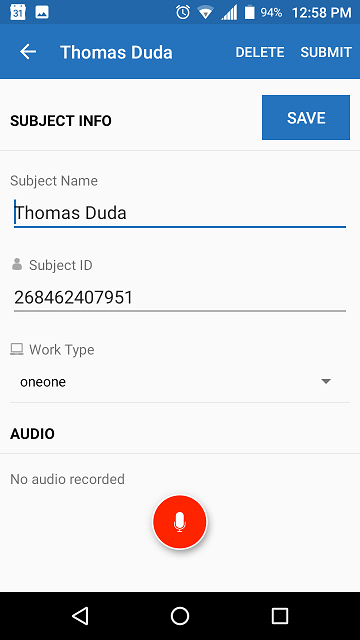
To start a new dictation from the main screen, you can select a person listed. If the patient is not on your schedule list, click on the + circle in the lower right side and enter the patient information.
To record, simply press on the red circle (record button). This will immediately start recording (image 9). If you want to make changes to the information displayed and do not want to record, click the “SAVE” button to return to the appointment list.
RECORDING SCREEN
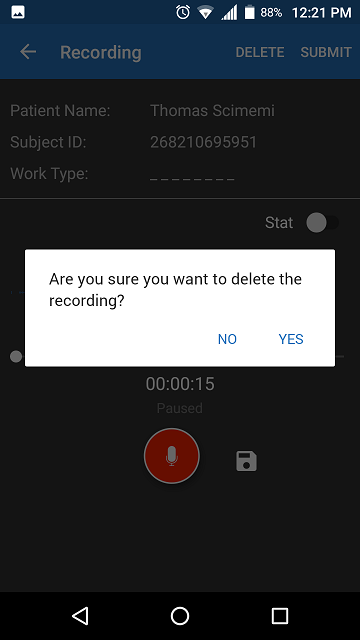
The Recording screen will display the subject information at the top. Please note the recording will occur immediately upon displaying the screen. To pause or stop the recording, press the Pause button (large red circle in the lower center of the screen.
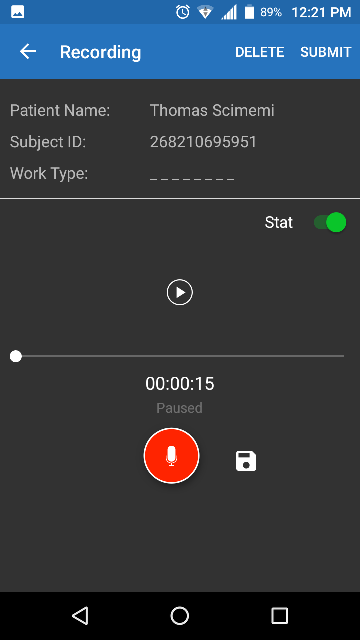
You can make the recording “Stat” by selecting the Stat button on the right side just below the subject information.
As you are recording, you will see a voice graph of you recording. This will help in determining if you are speaking loud enough for the device to record. This is displayed in blue in the middle of the screen.
Once you are done recording, press the Pause button.
This will change the large red circle from the Pause button to the Record image (microphone). The “Save Recording” button will be displayed next to the Record button.

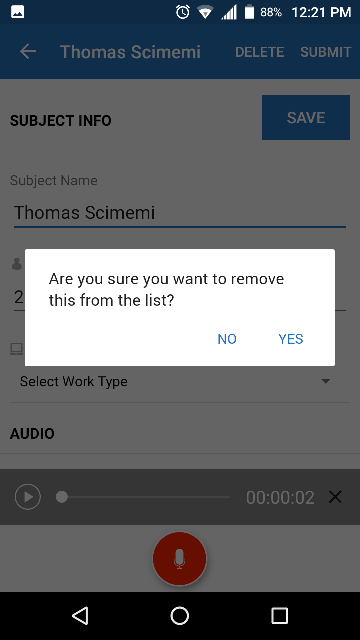
From here you can Submit the dictation by pressing “SUBMIT” in the upper right corner. If you want to submit the dictation later, click on the Save icon next to the Record button or press the back button, “<-“, in the upper left corner. By pressing save or the back button, you will then create a Draft. You can submit this draft or even append to it at a later time.
If you wish to delete the recording, press the “DELETE” button. You will be prompted to confirm you really want to delete the recording. This will not remove the appointment, only the recording.
You can delete the appointment AND the recording from the subject information screen.
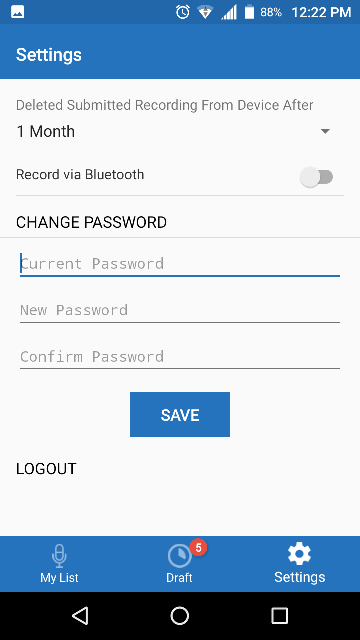
LOGOUT AND SETTINGS
The settings screen, accessible form the main screen by pressing the settings image in the lower right corner or the main screen, allows you to log out, change your password and set the number of days to save your submitted dictations. Dictation files are large files and can use up the storage on your phone. Adjust the time frame for deleting dictations appropriately.
Select Record Via Bluetooth if you are using a bluetooth device.