Creating a DSF Formatting Template |
  
|
Creating a DSF Formatting Template |
|
DSF templates are XML files with a dsf file extension. They are used to specify formatting options that are applied to portions of the XML document content.
Groups
An important part of the DSF templates to understand are Group elements. Groups represent sections of final document. In particular, they determine their section will be formatted – bolding, section content starting on the same line as section headers or on a separate line below, and list formatting options just to name a few.
Groups can have Subgroups, which are child Groups that are children of another Group. Subgroups specify the formatting of subsections within a section in the final document.
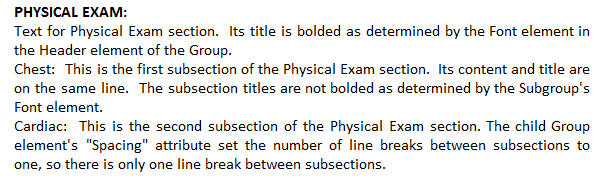
As an example, this portion of a final document shows how differences in the parent and child Group settings result in differences in the document’s section and subsection formatting. The parent Group has a Header with a “Spacing” attribute of “1” and its content starts on the line below its bolded section header. The Subgroup has a Header with a “Spacing” attribute of “0” and its content starts on the same line as its section header. Some additional differences in the parent and child Group settings are explained in the sample document itself:
Applying Groups to XML content
The Render Engine will apply the formatting settings of Groups to sections of the XML content document by matching the Group’s “Name” attribute value with the XML content’s section title.
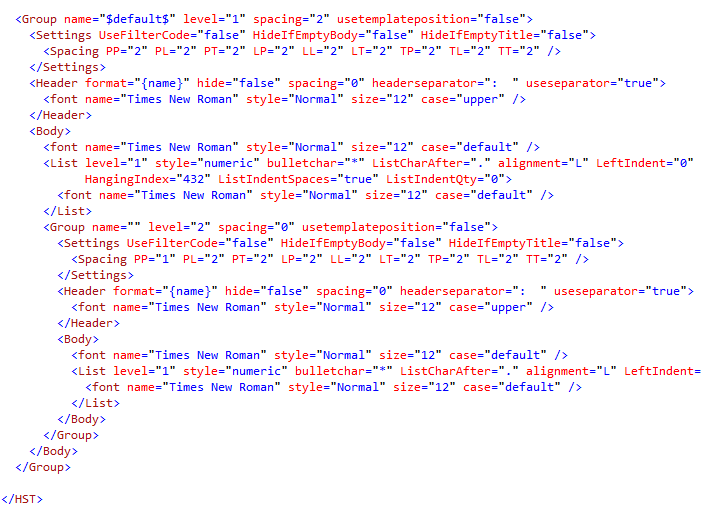
Here is an example. A Group from a DSF template with a name of “ALLERGIES”:
![]()
And a section from a Concord XML document with a title of “ALLERGIES”:
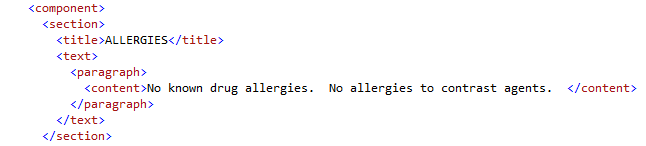
Since the Concord XML document has a section title that matches the DSF template’s Group with a “Name” attribute of “ALLERGIES”, that Group’s formatting options will be applied to that section’s content.
The DSF template can have several Groups with names for specific sections. If the Concord XML content document does not contain any sections with the Group names, those Groups won’t be applied to Concord XML content.
Default Group
A default Group is used to specify the same formatting options to multiple sections of a Concord XML document. The default group will be applied to every XML section that does not have a title matching a named Group in the DSF template.
A typical DSF template may have a few named Groups with formatting options that should only be applied to a specific section of the Concord XML document and a default Group with the formatting options to be used for every other section in the Concord XML document.
Creating a Template
To create a DSF template, perform the following steps:
1.Create a new blank document in any text editor. A DSF template is an XML document with a .dsf file extension, so the following element hierarchy must be followed.
2.Create an <HST> element. This element contains all other elements in the document.
3.Create a child <Document> element as a child of the <HST> element. This element and its children and attributes specify page level settings, such as margins, alignment, orientation, etc.
4.Create <Font> and <PageSettings> elements with the desired attribute values (see example templates below) as children of the <Document> element.
5.Create a <Margins> element with the desired attribute values (see example templates below) as a child of the <PageSettings> element
6.Create a <Group> element as a child of the <HST> element.
a.Specify the “Name” attribute of the Group element. If this will be the default Group, give it a value of "$default$”. If this Group is to be applied to a specific section, give it a value that matches the expected section title.
b.Add a “Spacing” attribute to the Group element. The Spacing value determines the number of blank lines that will be added after each section is added.
c.Add a “Level” attribute to the Group element. The Level value of “1” indicates this Group is a section as opposed to a subsection.
7.Add a <Settings> element as a child of the <Group> element
8.Add a <spacing> element as a child of the <Settings> element. The spacing element requires the following attributes:
a.“PP” – value indicates the number of blank lines between paragraphs within a section.
b.“PL” – value indicates the number of blank lines between a paragraph followed by a list within a section.
c.“PT” – value indicates the number of blank lines between a paragraph followed by a table within a section.
d.“LP” – value indicates the number of blank lines between a list followed by a paragraph within a section.
e.“LL” – value indicates the number of blank lines between a list followed by a list within a section.
f.“LT” – value indicates the number of blank lines between a list followed by a table within a section.
g.“TP” – value indicates the number of blank lines between a table followed by a paragraph within a section.
h.“TL” – value indicates the number of blank lines between a table followed by a list within a section.
i.“TT” – value indicates the number of blank lines between a table followed by a table within a section
j.“SS” – value indicates the number of blank lines between the end of a section and the start of a subsection.
9.Add a <Header> element as a child of the <Group> element. The “HeaderSeparator” attribute determines any text that will be between a section title and the section content.
10.Add a <Font> element as a child of the <Header> element. The font attribute determines the font settings of the section title.
11.Add a <Body> element as a child of the <Group> element.
12.Add a <Font> element as a child of the <Body> element. The font attribute determines the font settings of the section content.
13.Add a <List> element as a child of the <Body> element.
List attributes:
a.“Style”
i.Attribute value of “Numeric” for numbered lists
ii.Attribute value of “Bullet” for bulleted lists
b.“ListIndentSpaces” – true to use spaces when indenting list items, false for tabs.
14.Add a <Font> element as a child of the <List> element. The font attribute determines the font settings of the list content.
15.If this Group represents a section that could have subsections, add a <Group> element as a child of the <Group> element created in step 6. Child Groups are created the same way their parent Groups are, back in step 6. The only exceptions are their “Name” attribute should be blank – Name=”” – and the “Level” attribute should have a value of “2”.
16.Ensure each element has a closing element to make a valid XML document. I.e. <HST> must have a matching </HST> element enclosing all child elements.
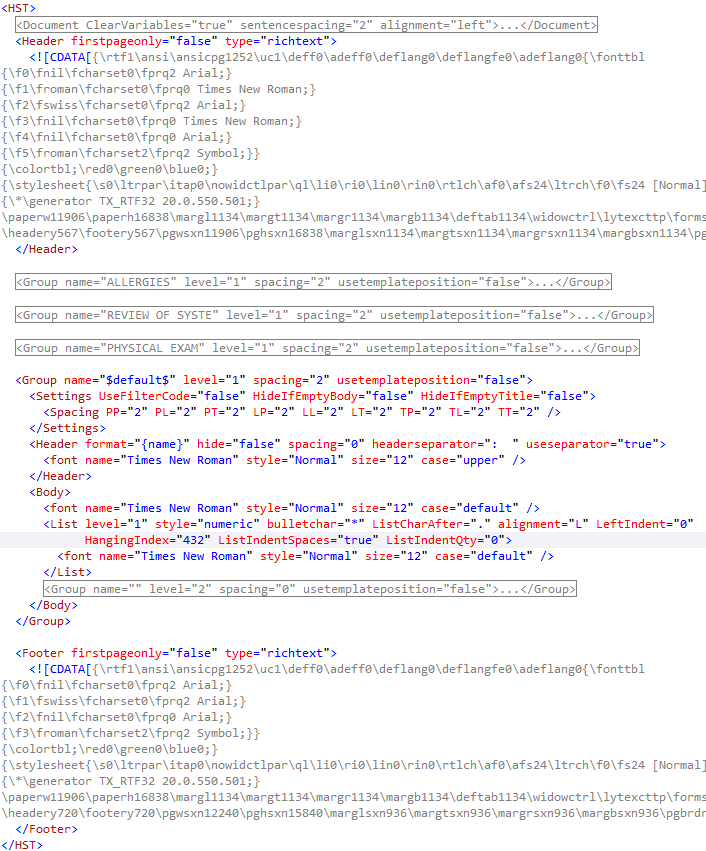
The following is an example of a DSF template with a single default Group. All sections in the Concord XML document would have the default Group’s formatting:

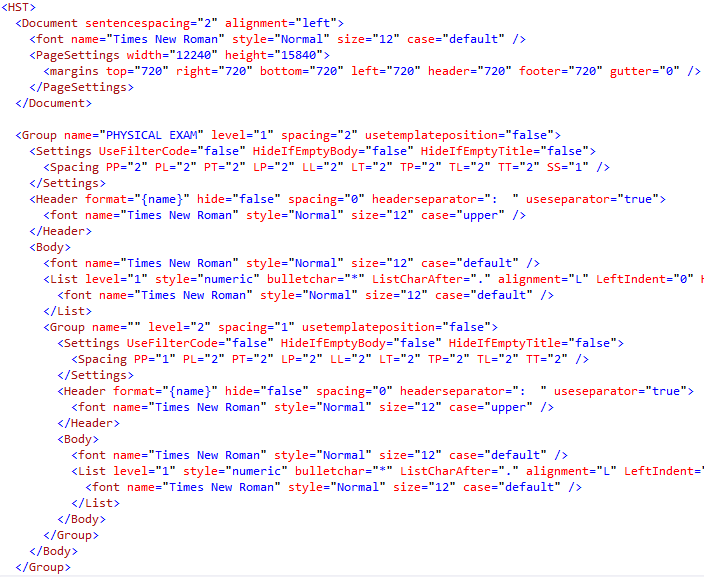
This is an example of a DSF template with a default group and a named Group:
Header and Footers
Headers and Footers can be added to a template to be included in the final document by including <Header> and <Footer> elements as children of the <HST> element. Headers and Footers can have placeholder values in them that will be replaced by the values passed in to one of Renderer’s methods or any values found in the Concord XML content. If no placeholder replacement values are found, the placeholder values will be removed. A placeholder value is lead with a “%” character and followed by “%%” characters. For example, here is a “LastName” placeholder value with the proper formatting:
%LastName%%
Header and Footer elements have the following attributes:
1.FirstPageOnly – Use a value of “true” for the header to appear on only the first page of the final document, “false” for the header to a appear on every page of the final document
2.Type – Use a value of “RichText” to include the header content as rich formatted text in the DSF template. The rich text goes in the content part of the <Header> element, enclosed in a <!CDATA[]]> element.
Here is an example of a <Header> element with the actual header content in richly formatted text:
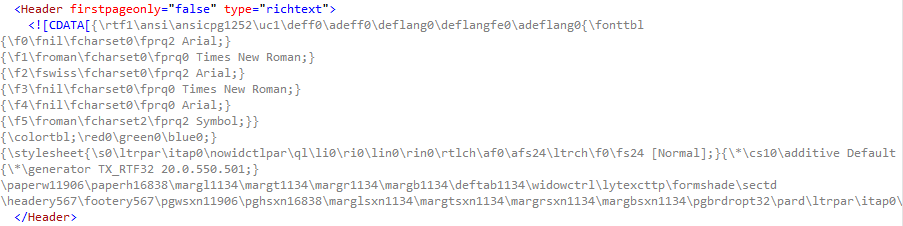
Here is an example of a DSF template with <Header> and <Footer> elements that include rich formatted text in their content: