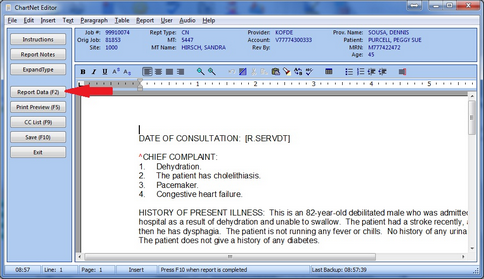
The Report Data Screen (RDS) contains patient and job information, such as job number, patient name, visit date, dictating physician, attending physician, etc.
You will be prompted to verify the RDS when you begin a new report when both transcribing or reviewing. You may return to the RDS at any time while working on a job, so you may change or add information to the RDS any time prior to submitting the document. To access the RDS from your job, use the shortcut F2 or select Report Data from the main window of the ChartNet or M*Modal Editors.

Click on Report Data or use the shortcut F2 to view the Report Data Screen
Filling in Fields in the RDS
The fields in the RDS is customizable, and may vary by account or worktype. You may find different fields are required when completing different work types or working on different accounts. Fields in boldare required. You may not submit your job without completing required fields. For an example of required fields, visit Report Data Screen Fields.
If your account has an ADT feed, most of the fields in the RDS will be populated for you when you start your job. Fill in the empty fields of the RDS using the information provided in the physician's dictation.
RDS fields in bold are REQUIRED.
You cannot submit your job without filling in all required RDS fields. |
Information Contained in the RDS
From the RDS, you may access additional information, including:
•Master Search: Access Master Patient Index (MPI) to locate the patient record for your job.
•CC List: Add carbon copy recipients.
•Instructions: Review Instructions for your job type, physician, and account
•Report Notes: Add Notes to your job for internal or customer communication.
Using F1 in the RDS
Fields denoted with the shortcut (F1) in the RDS are linked to a table. Place your cursor in one of these fields and press F1. A new window will appear with a table from which you may select the correct information to populate the field. Visit Use F1 in the Report Data Screen to learn more.