Split M*Modal Job |
  
|
Split M*Modal Job |
|
If you encounter a split job while transcribing or reviewing in the M*Modal Editor, place your cursor at the location where the first job ends and the second begins. Navigate to the file menu Report --> Split Document at Cursor. This will split your job at your current cursor location.
Jobs may be split as many times as required. Each job receives the same job number as the original job, followed by a hyphen and a number indicating which split job it is. For example, if your job number is 1234567, the first job split from the original will be numbered 1234567-1, the second job split will be 1234567-2, and so on.
Steps to Split a Job in the M*Modal Editor |
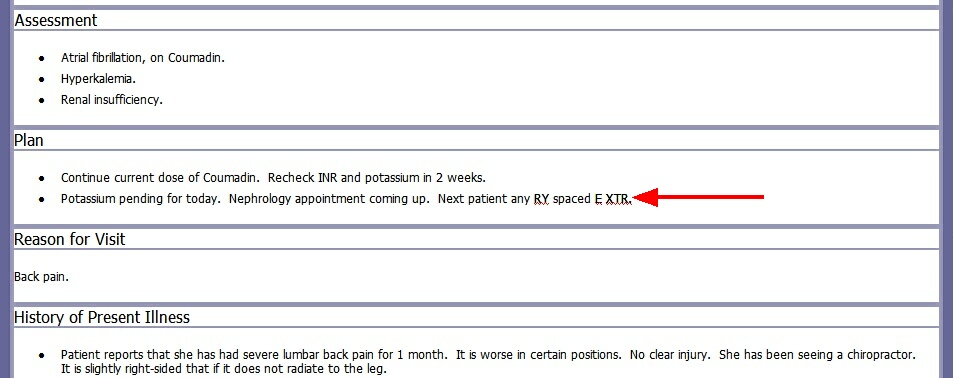
1.Identify the location where the first job ends and the next job begins. Locating split jobs in draft documents is easy since phrases like 'next patient' or 'next dictation' will appear in the draft. Also, a visual cue that your job is a split job is repeating section titles in the draft.
In the image below, note the phrase 'Next patient.' To split this job, place your cursor to the left of the phrase 'Next patient.'
|
Place your cursor at the point where the next job begins
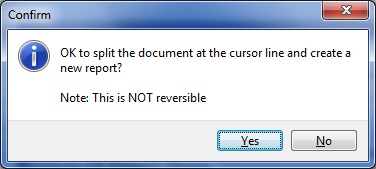
2.Navigate to the file option Report --> Split Document at Cursor. A Confirmation dialog box will appear, asking you to confirm if you would like to split the job. NOTE: This action is NOT reversible.
Click Yes to confirm the Split Job
3.You will be prompted if you would like to edit the Report Data for the split job. You must edit the Report Data for the second job if the dictation involves a new patient or work type.

Click Yes to edit the Report Data for the split job
4.The Report Data Screen will appear. The Report Data Screen will contain the information pertaining to the first job you have already submitted. Update the Report Data Screen as necessary to ensure the correct information for the first split job. If required, change the job's Form Type.
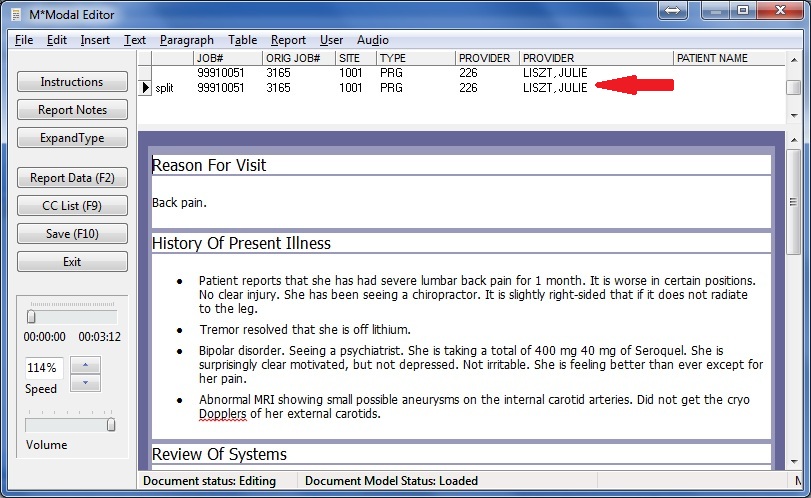
5.Notice that two jobs now appear in the M*Modal Editor queue at the top of the M*Modal Editor window as highlighted in the image below. One of the jobs will be labeled 'split.' Click on the two jobs within the job queue to load each one into the M*Modal Editor.
Click on the job in the job queue to load it into the M*Modal Editor
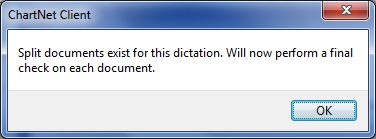
6.Repeat steps 1-5 until all reports have been transcribed. When you have completed all split jobs, click Save or use the shortcut F10 to complete the job. A prompt will appear informing you that ChartNet will now run checks on all documents you have created from the original job, including SpellCheck and checks to make certain all required fields have been populated in the Report Data Screen.
Click OK to confirm you are ready to submit the job and all split documents.
Click OK to confirm submission of all split documents
7.If any information is missing, a Warning dialog will appear, as shown below. You will be directed to correct the error or complete required fields.
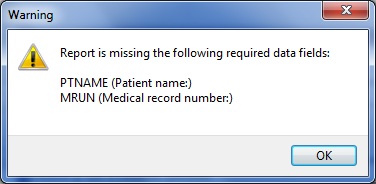
A warning dialog will appear to alert you of any missing information
8.Once all checks are completed, a Reminder window will appear. This is a reminder that you must manually submit each split job from your review queue. Click OK to confirm you have read the message.
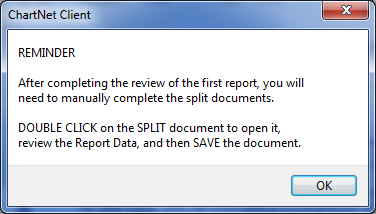
A Reminder message will appear to remind you how to complete your split job
9.Your split job(s) will now appear in your Review Queue. Right-click on your split job(s) and choose 'Complete split document.' If necessary, you may re-open your split job(s) by double-clicking on it from the Review Queue.
Jobs in your Review Queue that were split are marked with an 'S.'
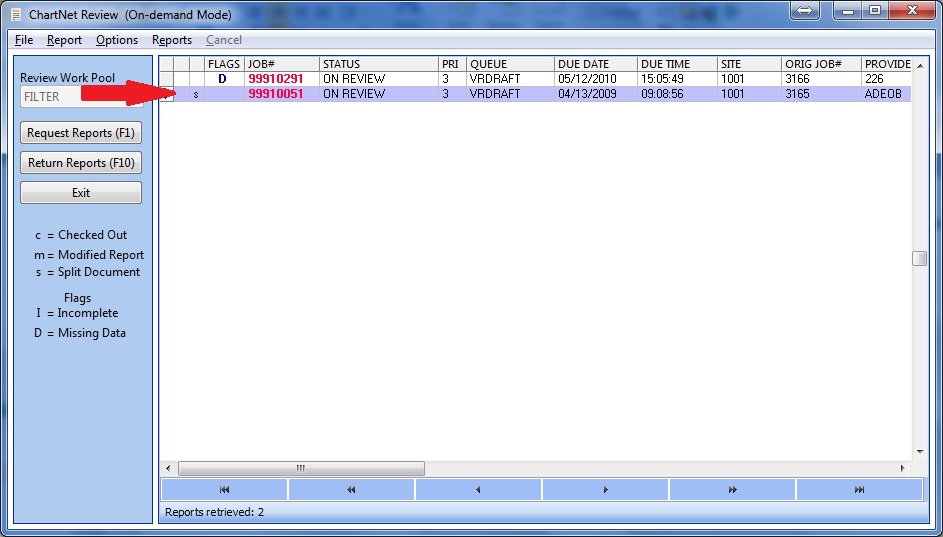
Split jobs are denoted with an 'S' as highlighted in the image